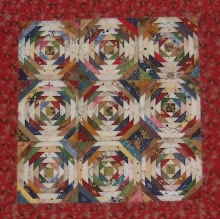
Purple and Paisley is a newer quilter and came across my Freezer Paper Piecing Tutorial and decided to try it. Like me she hated paper piecing. Well she fell in love and did her own tutorial for it on her blog and it is WONDERFUL! You have to go check it out! Her instructions and pictures are excellent! She is even having a give away for visiting! I've added a link to her tutorial on my sidebar as well for future reference.
I'm off for the weekend, will be back on Monday!
Showing posts with label Freezer Paper Piecing. Show all posts
Showing posts with label Freezer Paper Piecing. Show all posts
Friday, April 04, 2008

Tuesday, April 03, 2007
How I freezer paper piece

Quilting Bebbs asked how I made my crossed canoe blocks with all those points and funny angles to get them to turn out so nice. This method is also wonderful if you have a lot of bias edges. So, I thought I would take you along with me as I made some more last night! This is long - but a favorite method of mine, so sit back and enjoy the ride....
 First off - don't let the name Freezer Paper Piecing scare you off - especially if you HATE paper piecing. Because I HATE paper piecing, but I love this method. I use it when you have odd angles or shapes because it helps guide the fabric placement and cutting out of the pieces! And no guessing how much of the fabric should hang over! The main things I've used this method for is compass type blocks and funky prim type blocks such as:


 But in this case it helped the crossed canoes tremendously. First I needed templates because of the odd angles and shapes, and lots of bias edges. Also because of the odd angles it is hard to guess how much the dog ears should hang off - so freezer paper piecing solves it all. Plus these blocks finish at 6" so they are fairly small, another plus to this method.
 I start by putting as many of the templates as I need or can on a sheet of paper. In this case I need 4 template A's, 4 of B, 4 of C and 4 of D to make 1 block. I was able to fit all of them on one sheet. If you don't have a copy machine at home, you can trace these on freezer paper. But I get lazy, so I get them all one sheet of paper and then I have freezer paper I've bought pre-cut to the size of regular paper, I send it through the copy machine (printer)! Since I had to make multiple blocks I made 2 sets of templates. But these templates can be used over 3 or 4 times so you don't need multiples if you want to save on paper.
 Next you need to cut your templates out on the line. I take my time and use a rotary cutter and ruler because I get nice straight lines. But you could use scissors as well. This is the longest part, but well worth the effort. Once you have the pieces cut out, you iron on the templates onto the back side of your fabric.
 Now you cut out your pieces - adding 1/4" seam allowance as you cut. Put your ruler on the 1/4" line and rotary cut the pieces! For small angles don't worry if some of the point gets chopped off, your fine as long as you have at least 1/4" beyond the paper.
 Now you get to sew! And here is the cool part. First visualize where the first pieces go together. You want the freezer paper to line up, not the edges of the fabric. I always lay the pieces out on my sewing table. Then you poke a pin on one corner of the freezer paper template from the wrong size of fabric A then into fabric B from the right side. Holding the back piece of fabric up to a light you can see the paper template shine through so you can find the corner on that piece. When you first start I would then put a pin in on the other corner to center the piece. When you get used to this method I cheat and only do one corner! The pins get stuck in only at the point, you don't really "pin" the fabric. The pin is only holding the pieces together at that one part.


 Lay the piece down on the sewing machine and sew along the freezer paper edge (I use a smaller stitch length - about 1.5 to 2). I keep the pins in as long as they are not in the way. Oh and I find the pins work better to line things up when you push them all the way in up to the head of the pin. In the picture above you are looking at the back of the piece. Here is a row of little canoes, first seams sewn.
 Then proceed to the next piece that needs to be sewn on. Do as described above.


 Here is what you have now after all 4 templates are sewn together. Trim off the dog ears.

 Then sew the miniblocks together to get the full block. Notice the freezer paper stays on until the very end. This helps the bias's from stretching. When your all done, peel the freezer paper off. You can reuse these freezer paper pieces again!

 Every now and then you will hit the edge of the freezer paper when you sew. Just rip it off the stitch line and toss. I sew these with a smaller stitch length (around 1.5 to 2) and then the freezer paper tears off at these points easily.
Subscribe to:
Posts (Atom)