
 Here is another favorite tip of mine. This one for making applique circles. I took a class once with Karen Kay Buckley - it was one of the best classes I"ve ever taken. Well she makes her applique circles with heat resistant mylar circles. I love this way! She started buy using metal washers from the hardware store. Then the washers went mylar. And now she produces mylar circles just for this! I got mine from Connecting Threads, they come in many sizes within a package, and there is a smaller circle package and a larger size circle package.
 Start by tracing around the circle on the fabric, then cut about 3/8" or so around the circle. Make a running stitch around the circle near the outside edge leaving 2 thread tails hanging.

 Next you need Magic Sizing, a paper cup and small cheap paint brush. Put the mylar circle in the center of the piece, pull the strings to gather around the mylar circle. Hold and paint on some magic sizing onto the back with the paint brush (spray the magic sizing in the paper cup, it turns to liquid). Let me tell you - I needed 4 hands to do this and take pictures!
 Use a hot dry iron and hold the iron on the circles until the magic sizing dries.

 Then gently open up the circle where the string tails are and slip the mylar washer out. I have a pile of circles here that have the washers pulled out.
 Then gently pull the strings again to get back the shape and knot the thread, then trim off tails.
 In no time at all you have a ton of fun circles to applique down. I then use Roxanne's Glue Baste it to attach them to where I want them on my applique piece and sew them down without having to turn under edges or remove freezer paper!


19 comments from wonderful readers:
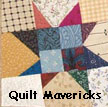
You have more patience than me Dawn - lol ! If I ever conquer my fear of applique I may try this. That block is wonderful.
Now that looks like a very useful tip. I cannot get to grips with needle turn applique, and my circles are always mis-shapen.
Neat tip. I use a lot of those circle stickers you buy and do needle turn. Problem comes in when you need a big circle can't find circle stikers larger than
1", so this tip will come in handy.
What a fabulous idea and great instructions. Thank you for posting your technique. I must keep it in mind next time I need circles.
Thanks for the info on the precut circles!
I have used this technique before but I never seem to get a nice smooth circle because of how hard it is to cut one out!
I will look for them at my LQS
Great blog too!
I've done this technique using various size coins (foreign currency adds even more variety). The metal conducts the heat and sets in a good crease. Call me "old fashioned" but I just can't get my head around using products like starch and glue in quiltmaking! The techniques must work well ~ your applique block is perfectly lovely!
Thanks for the great tips. I love the mylar circles but hadn't tried leaving the basting thread in. I'll try it that way next time.
I haven't used the fusible thread. I'd like to try a binding with it. Looks easy!
oh..used a similar method in another circle class I took too...thanks for the great photos though...
Love it. do the same thing except that I knot at the beginning and sew to the end and leave just one tail, then I pull and when done I don't tie off because I figure it's gonna get sewn anyway.
BUT, when I have them all done I leave the tail and gather all the tails together and knot them to keep me from losing them. It looks like a bunch of cherries! I snip off one as I need them!
Yep - that is one particularly yummy way to make circles. Lately I've been doing needleturn for everything . . . just for chuckles. But I'm going to go back to this method for circles. I have an idea rolling around in my head that will need lots and lots of circles and I don't relish the idea of needleturn for them *s*
great tutorial! I've always wanted to try the "starch" method but didn't want to buy starch - I use Magic Spray Sizing all the time (don't really think of it as starch - like we used "back in the day" :-) ) This is wonderful, can't wait to try it!
SuzK
That is so darling! And the circle technique is great. I have used those mylar circles and what a treat to have all those sizes to choose from. Will you need more circles in the border?
What a nice tutorial Dawn! Thankyou, & well done on getting the photos!
I love those mylar circles - must purchase the large set, though. Great tutorial and I love the quilt. Cute!
Fantastic tutorial and great pictures. I need to get some of those circles. I love the Kentucky Wildflower with the red plaid background.
HERMOSAS TUS OBRAS
CLAUDIA
Just spotted your blog, coming here from a link. Nice job!!!
Great Tute, maybe I missed it but I realy like the pattern, Does it include your great tute or do I need to save that seperate. Also I am going to look where I can get the pattern, if it is not posted can you let me know. Thanks Bunches, Donna Rae
Hi Again, I just checked out the rest of your tutes and they are some of the best picture tutes I have seen yet. I almost feel like I could sew a zipper. Well if you decide to do a tute on zippers you will for sure have many thankfull visitors. Hint hint. Thanks for all the tutes! Donna Rae
Post a Comment