
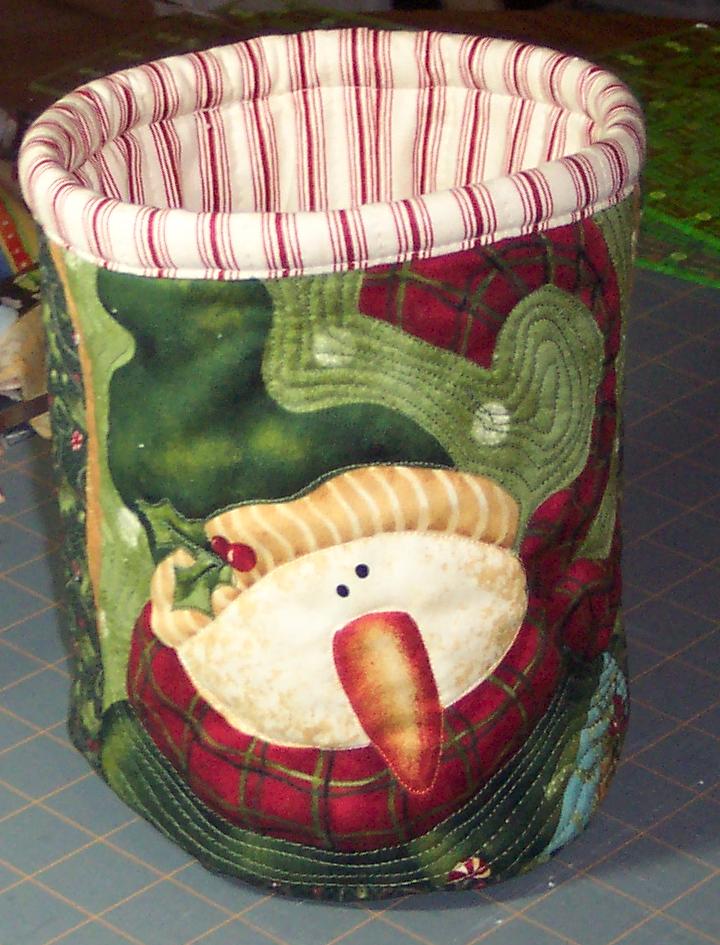
 Several of you wanted to know how to make a fabric canister, and I thought, what a great idea - I bet a lot of you would like to make one for Christmas decorations or gifts. You can put cookies in a zip-lock bag and put that inside it for a gift, or fill it with candy - or whatever!
So here is the first step to get you started. I thought I would post this part first to give you time to dig up your fabrics and scrap batting! I made the one above by cutting out a part of a preprinted Xmas stocking, but the one I'm making now I'm just doing with novelty fabric.
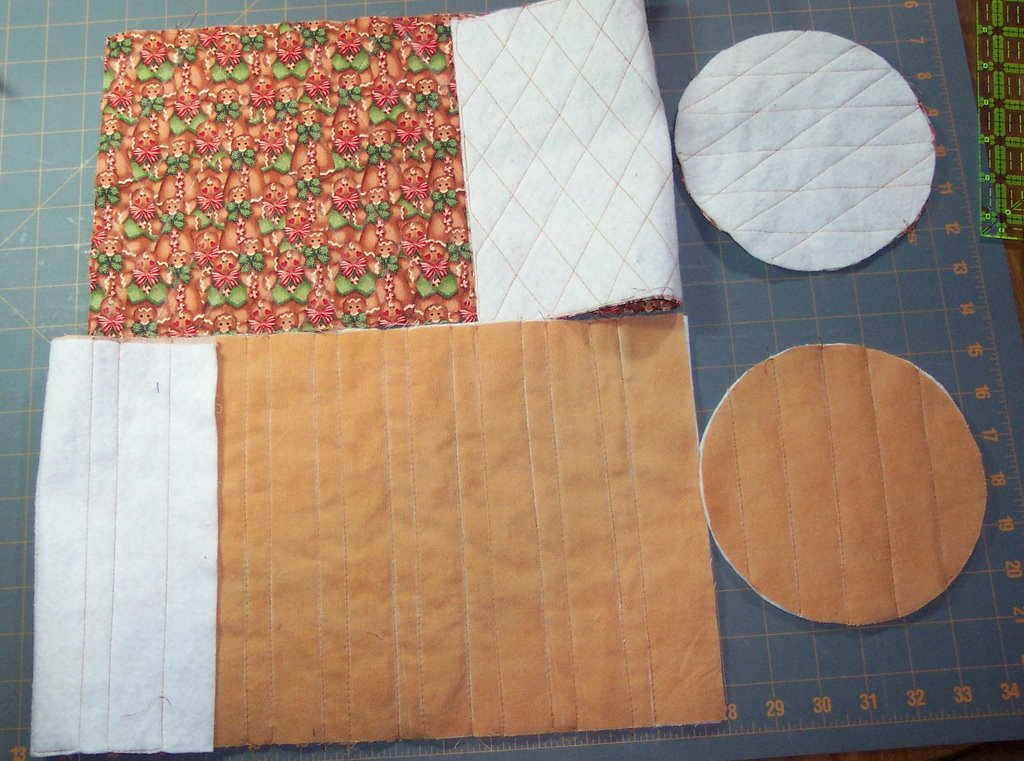
 Cut:
Cut:1) 8" x 18-1/2" outside fabric. (If you are piecing the outside just make the finished pieced piece 8" x 18-1/2".
1) 9 x 18-1/2" lining fabric.
1) circle 6-1/4" in diameter (across) from outside fabric.
1) circle 6-1/2" in diameter from lining fabric.
1) 8 x 18-1/2" batting.
1) 9 x 18-1/2" batting.
2) circles from batting.
Quilt:
Quilt fabric onto corresponding piece of batting. You don't need to put a backing underneath the batting. I do very minimal and simple quilting on the lining piece and bottoms. I do a bit more on the outside fabric. I"ll have a picture of my quilting later today, but if you want to be adventurous go ahead and start your quilting!
And as you can see you can adjust the size of the canister. Make the lining piece about 1" taller than the outside fabric and adjust the circle size depending on the width of the canister.
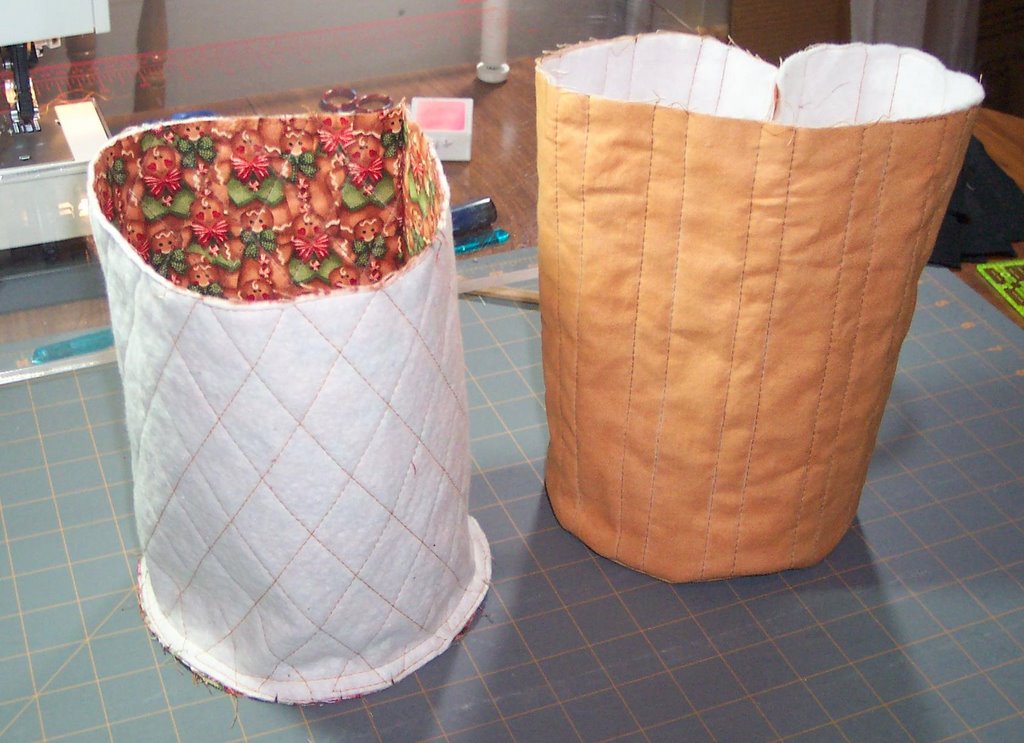
 Here are what my pieces look like after they are quilted. Once you have this much done you actually have all the hard parts done!
Someone wanted to know what to use for a circle template. Your going to have to be creative on that one. I have circle templates for quilting, so I have a ton of sizes available, just find one that is about the right size. If nothing else draw a circle on paper with a pencil and string. The string should be just a tad over 3" from the pencil to where you hold it on the paper.
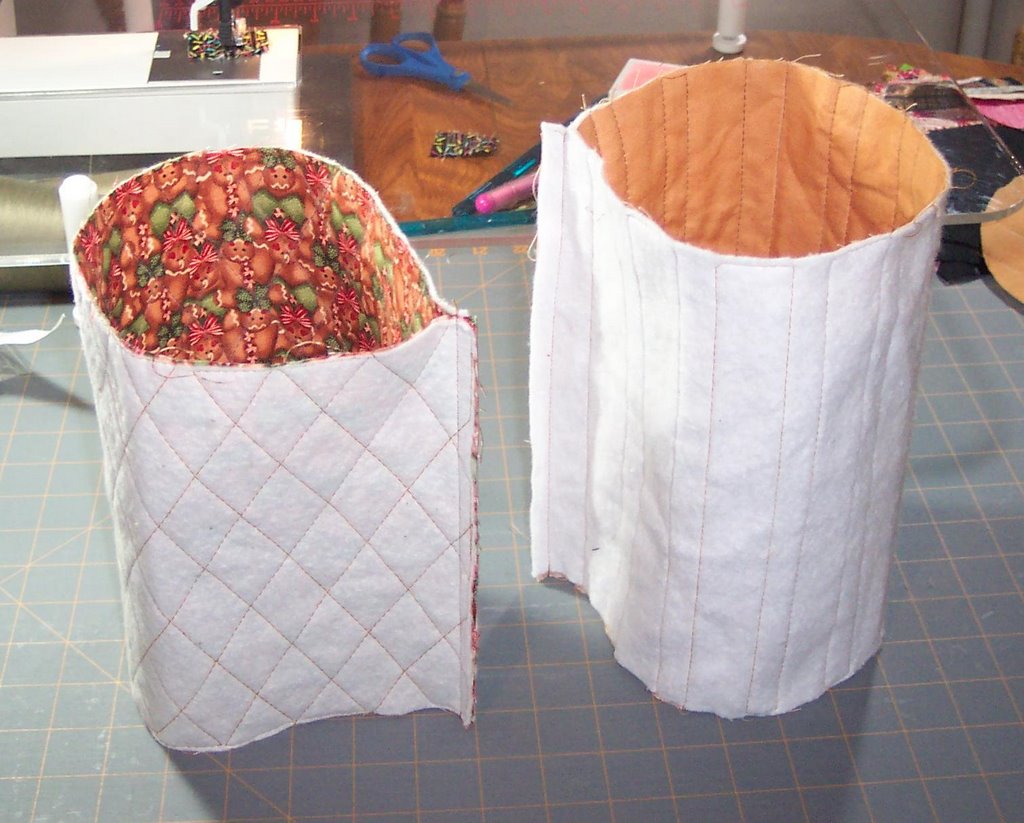 Once the 4 pieces are quilted, sew the 2 canister pieces into tubes as shown above. I use a generous 1/4" seam.
 Then fold all 4 pieces in half and mark the ends with pins. Fold in half the other way and mark again with pins to get the quarter spot on each piece.
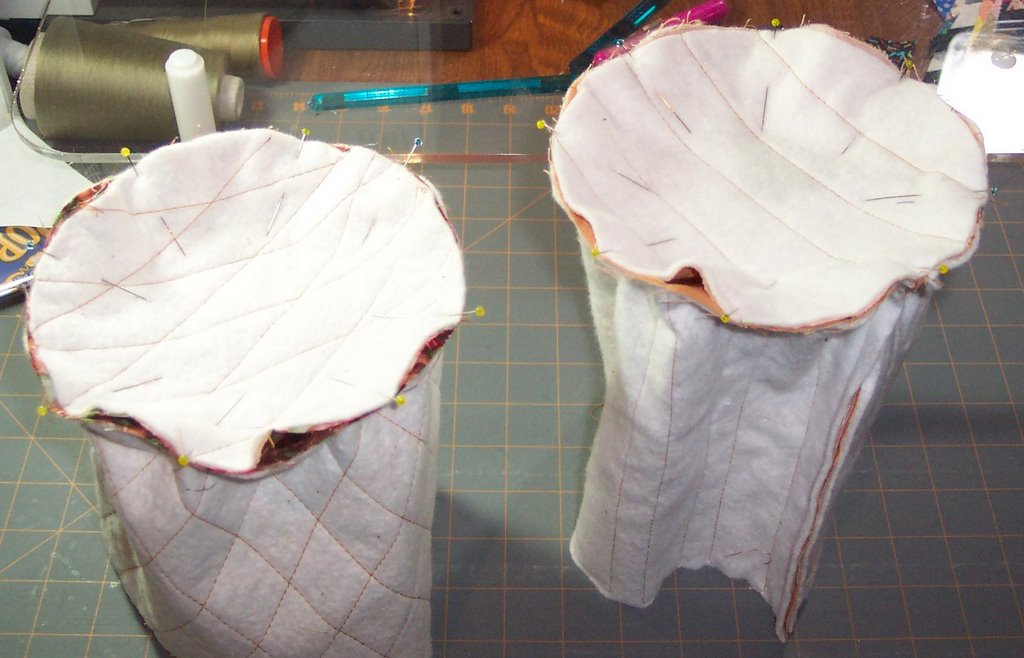 Now pin the bottoms onto the tubes matching the quarter spots first and then fill in as needed.
 Sew bottoms onto tubes with generous 1/4" seam. I find the walking foot at this point really helps. Waaa-Laaa - you now have 2 tubes with bottoms!
 So here you are - the end to the canister instructions!
 Next take the inside lining piece and turn it right side out. Then place the lining piece inside the outside piece (which is still inside out). Sew top edges together with about a 1/2" seam leaving about 4" open.
 Turn canister right side out through opening, and shape bottom. Smooth up outside and lining pieces up. Lining will stick above the outside.
 Flip down the lining piece to cover unstitched opening and top stitch around canister to hold the fold in place.
And there you have it - a cute fabric canister!


1 comments from wonderful readers:
I think this little canister is neat- thanks for showing us. Shirley
Post a Comment