Wednesday, January 31, 2007

And here it is..... Leavez!

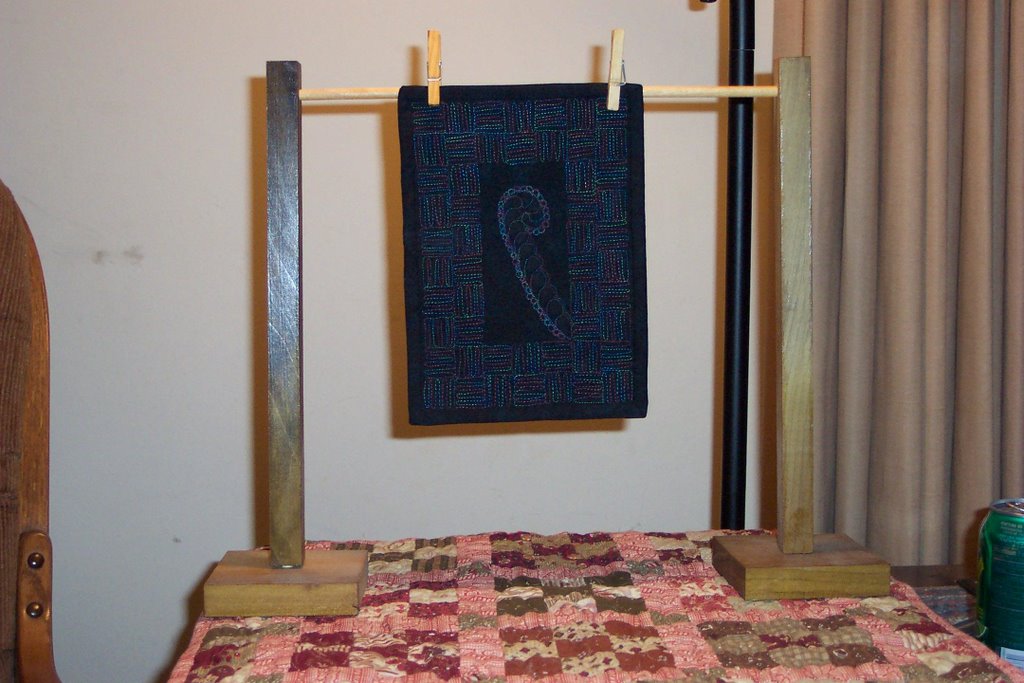
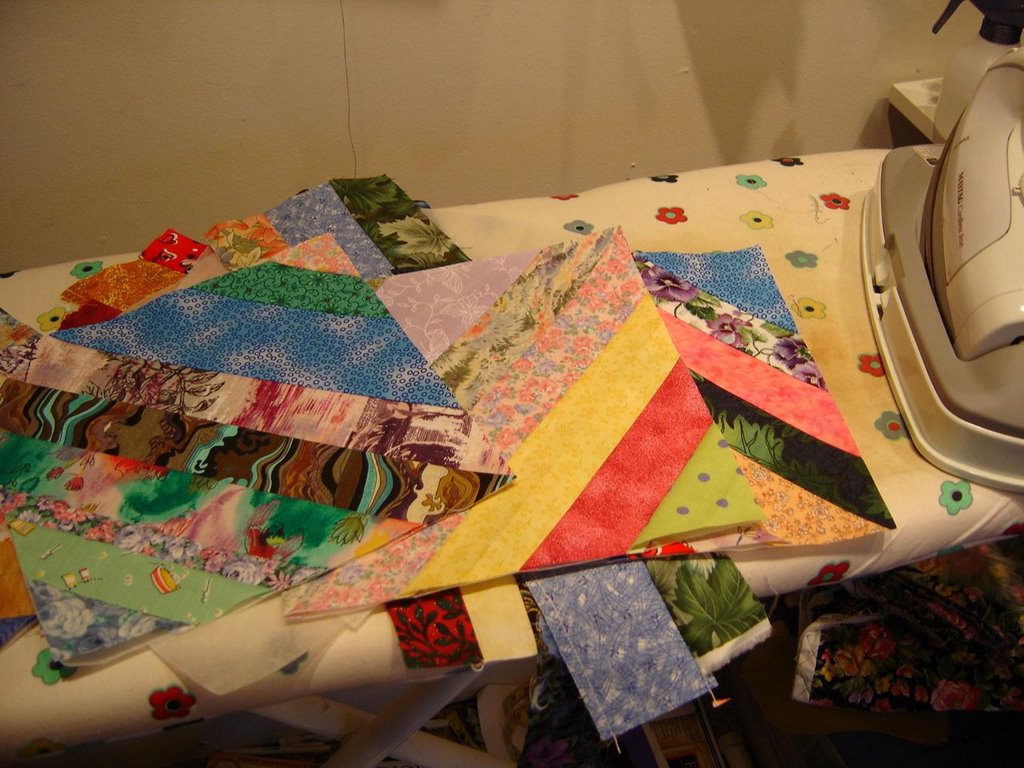
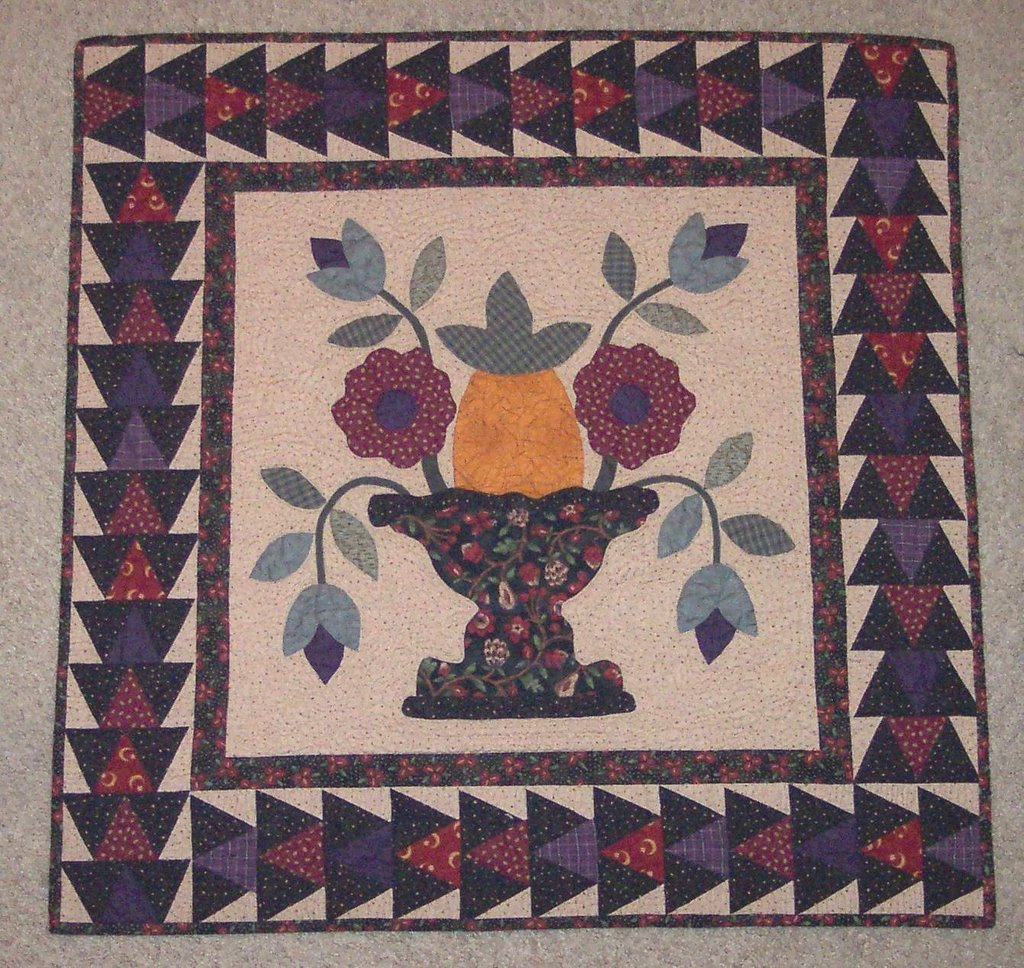
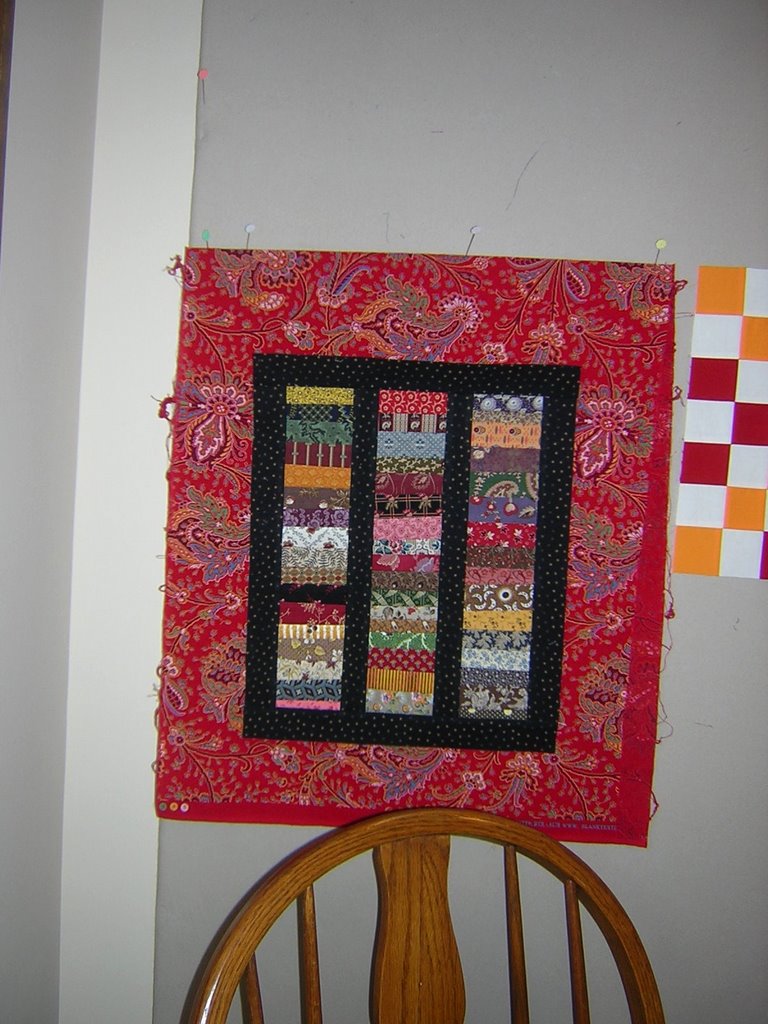
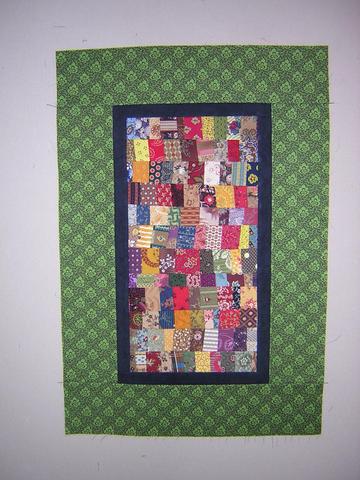
Yes this is a Jan Mullen pattern called Leavez! I love how it turned out. I added the black borders, they were suppose to be a darker aqua in the pattern, but I decided I liked the black better - doesn't it really bring them out!

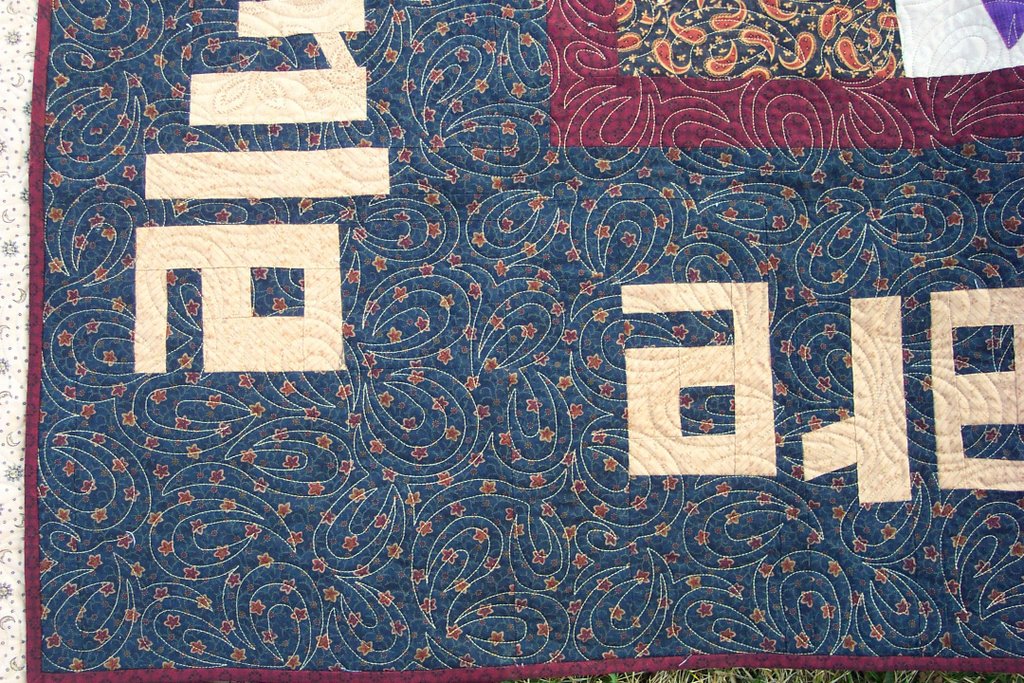
And I learned a new method this weekend that I put on here. Piping Hot Binding! Well I didn't do the binding but I put piping in between the 2 outside borders, you can just make out the black piping. I love how it looks.

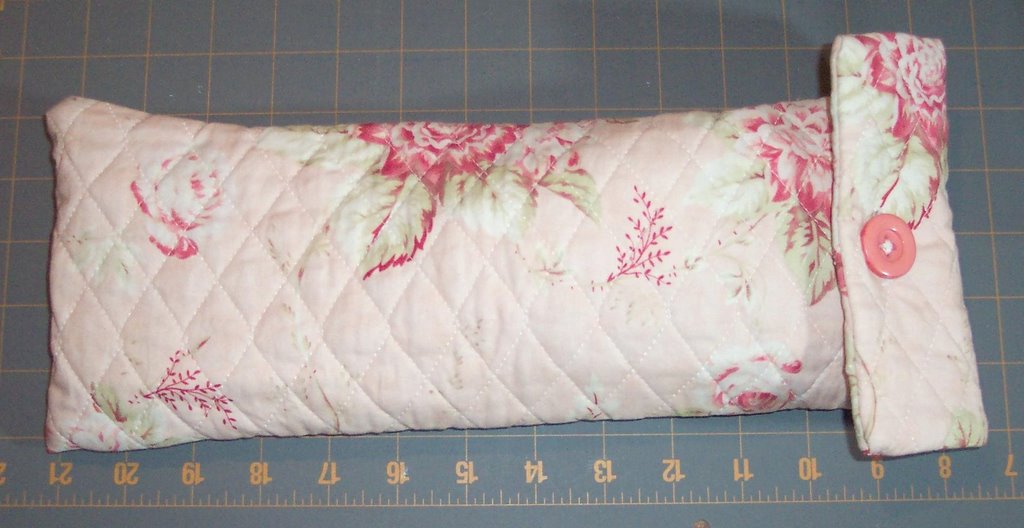
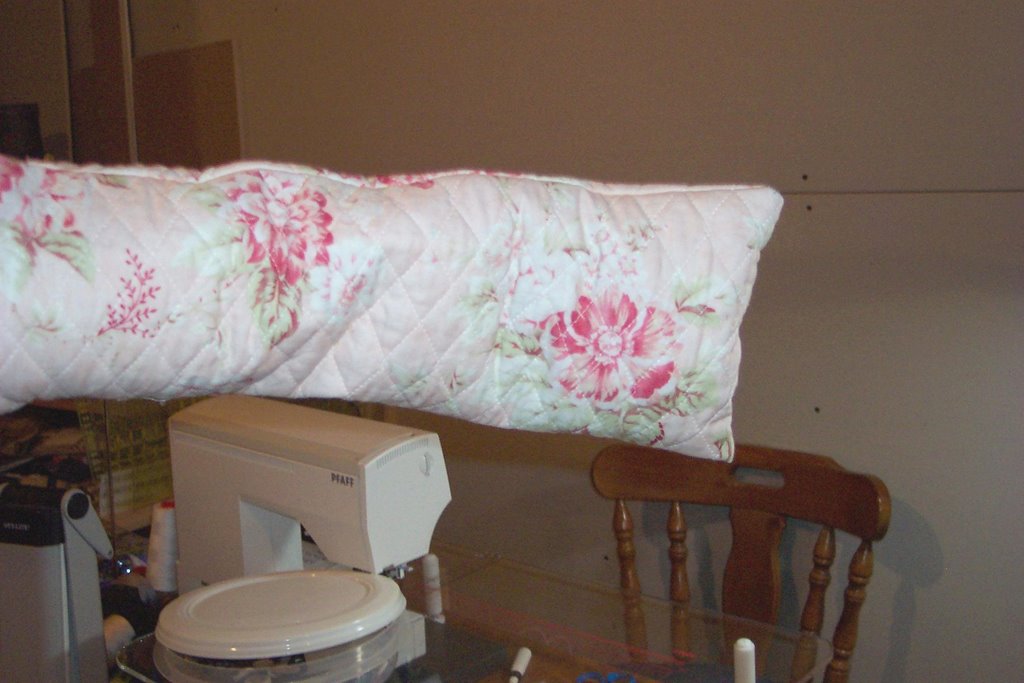
Well here is the website and the tool. It comes with a very detailed and good book for instructions, so even if you don't have someone to walk you through it, the book does a good job. (Book as in about 11 pages with lots of pictures - not tons of pages). You can put piping on with your binding or between borders or blocks like I did. It takes a bit of time but the results are wonderful! Mine isn't perfect, but pretty good for a first try. The hardest part was finding a good foot for doing it. Ideally you would have a piping foot. I tried several different kinds of feet and then found out one of the ladies had a Pfaff machine there who had a piping foot so I borrowed that - what a difference. But certain zipper feet would work as well.

So now you have it!

Monday, January 29, 2007

Just a bit more....

A bit more to tempt you... I"m so far behind at work I won't have time to sew much this week, so I thought I would drag this out just a bit more.... But this gives you a pretty good idea of what it is.

Oh and for those of you who think this is for someone else - NOPE - it is mine! My good friend in Australia sent me the pattern and the fabrics and I just LOVE it! And believe it or not I love lime green!

Sunday, January 28, 2007

Just a quick peek...

Back from the retreat, so have tons of catching up to do at work and home, but wanted to give you a quick clue as to my project this weekend... just a small peek.

Wednesday, January 24, 2007

What will it be????

I"ll let you guess (and be shocked by the colors and fabrics) of the pieces I have all cut for my retreat this weekend with Laura and Linda. I also found out Sossy is going to stop by to say hi with her son! Oh and stop by Sossy's blog and tell her Congratulations - she got her braces off this week!!!!! Wooo Hooo!!!!!

Won't see you all until next Tuesday......

Tuesday, January 23, 2007

Happy Birthday Bonnie!!!

Happy Birthday Bonnie!!!! Hope your feeling better and take it easy today.

And even thought she is feeling rotten look at what she finished for me yesterday! The colors are a bit muted and shaded (but I really wished they looked like this for real!) so Bonnie could get a good picture of the quilting - yes it is her famous fans! Don't the fans look perfect on this quilt! I've had this quilt top done now for years and years. Just never knew how to quilt it. So when I was cleaning up I came across it and said - "yup, it needs Bonnie's fans!". Bonnie is working on another quilt of mine once she feels better so it will be a bit yet before I take a full picture with the binding on - so guess you have something to look forward to!

Thank you so much Bonnie! And I hope you have a very Wonderful Birthday!

Monday, January 22, 2007

More about the Scrap Projects

I had so many questions about how I got all that cut out from the strips I thought I would try and show you. I didn't have time last night to actually take pictures as I cut so I tried to draw it out for you - remember an artist I'm NOT! And the scale is a bit off, but this should help.

Also Bonnie was kind enough to confirm for me what book it was that did that magic 9-patch trick. The book is shown above. It is Slice 'Em & Dice 'Em Quilts by Nancy Brenan Daniel. I have to get this book now!

OK now for the scraps. From a 4" x 20" strip (dark strip) I cut as below.
Sorry, when I scanned the picture the lines didn't turn out as dark as I hoped and didn't look at the picture until this morning. Anyway, I cut the 4 dark Kaleido pieces first. Then the triangle. Then the tumbler. sometimes I can get 2 tumblers. Then a 1-1/2" x 4" strip for the my small 9-patches.
The Kaleido ruler (above) I'm using is by Marti Michell. You can cut all the size pieces you need from this ruler and it has great markings and instructions. Here is the "how to" online also.

For the triangles I'm using the Tri ruler (above) from the Tri-Recs set. You'll find these all over, even at JoAnns. I LOVE this ruler. I use it for lots of different things. Once again you can see how to use it here.

And last is the tumbler. I just happen to have a tumbler that makes about a 5 or 6" tumbler, but all I do is line up the top of the tumbler template to the top of the fabric strip and cut (so the bottom of it hangs off the strip of fabric). Mine came from Quilters Harvest, but you can find tumbler templates everywhere also.
One thing I didn't show is for the light part of the Kaleido block you also need 4 additional smaller triangles. I didn't draw a picture for this, but it is a similar idea. I cut the 4 big Kaleido pieces. Then the remainder of the 4"x20" strip I cut down to 3" high. From that I use the other corner of the Kaleido tool to cut the 4 corner triangles. I don't worry about a triangle or tumbler from that strip.

I sure hope this helps.....

Sunday, January 21, 2007

My scrap projects

Here are the 5 scrap projects I started working on last year from the 4" strips I had, but then life got in the way and xmas gifts had to be made! So for the next few weeks I'll get to work on them again! When I tire of them, I'll set them aside and pull them out as I feel like it.

The above blocks will be my Kaliedo quilt. I cut these out first from the 4" strips. These blocks I've been piecing when I get some cut out.


Next I cut out a triangle. I have several triangle quilts I'd like to make along the lines of a 1000 pyramids and similar variations. These I haven't started piecing yet, I"m just collecting the triangles.


Then I cut out the tumblers. Sometimes I get 2 tumblers out of what I have left. These will be a queen size regular tumbler reproduction quilt.


Last but not least from the smaller leftover I cut a 4" x 1.5" strip to make 3" finished 9-patches. At some point in time they will become just a regular 9-patch quilt with the patches alternating with a square of a shirting.


But most fun is the string star quilt I"m making! This is made from 2" strips! Lucy is teaching me how to make it! First you make 2 string arms and one green diamond and she told me I have to have lots and lots of them. I've got 2 made!!! snicker..... But that is what I"m going to work on this coming weekend at my sewing weekend with Laura and Linda at Miss Mary's!!!!!

Bonnie's 9 patch trick...


So Bonnie, is this the right idea? After you have all your blocks done and together you only have to cut and build sashing and cornerstones then for 2 outside sides?

Yup today I"m playing. I"ll have more play stuff later!

Thursday, January 18, 2007

Mini Quilt Stand

I've been so busy lately with work and some sewing. But the sewing I'm doing is making more thread organizers for some gifts I need down the line - so nothing exciting to show!

But at small sewing group last Monday night they reminded me I never took a better picture of Julie's practice mini quilt she made me for Christmas. Well then I remembered I never showed Julie the little stand I made for it. So I thought I would show you both today! With the little clothespins I can even change the quilts easily for a change of pace! Nothing fancy, but it works!

I had breakfast with Karen from Of Quilts and other Musings yesterday! She had a layover in Chicago so I met her at the airport and we had a lovely relaxing 3 hour breakfast! It was so good to see her. The only drawback was we didn't have quilts for show and tell and no sewing machines to play!


I was sewing string blocks for mindless sewing Monday night at small group and got everyone in the act. They decided it was so much fun they started helping me press, trim and pick out pieces to fit the next string! Well my friend Joan decided she liked it so much she went out to Sams club and bought Kabinet Wax and started her own yesterday! Aren't they great! I can't wait to see how she sets them!


ADDITION:

I just saw Karens of Sew Primitives picture of Jo Morton's little orange star quilt with the big stitch, had to share my version with her. I didn't big stitch it, but did make mine funky colors - Red and Cheddar....
Red and Cheddar Stars
dquilts

Monday, January 15, 2007

Thread Organizers

Thought I would quick post some information on the thread organizers. The ones in the last post are the small ones. Back in October I showed you the large version I made for myself.

And yes it is from a pattern. Go to this post for information on the pattern.

Weekend Sewing

I finally worked on the small thread organizers I wanted to make for my friends for xmas! OK, so I"m only a month late! But they did turn out cute!

I also got 2 more snowmen blocks done. I hope to work on some more thread organizers this afternoon for future gifts! Might as well get them made while I remember how to do it!

Sunday, January 14, 2007

If I were a rich man.....

Or a rich lady.... I"d buy antique quilts! I found some awesome antique quilts yesterday at an antique store, playing with my friend. We hit some shops, the antique store, went to this really fun shop of nothing but spices, had lunch at a deli and then went to see the movie "The Queen" - which was very good by the way. It was strange watching something so historical but remembering the actual event!


Anyway, this antique shop had some awesome antiques quilts. And probably not priced badly, but I just don't have the money to spend right now. But I did get some pictures (with permission). I had such fun looking at them and touching them! Thought I would share them with you.


Thursday, January 11, 2007

Snowmen Progress

I hadn't had time to touch my snowmen Hot Chocolate project since September. I finally worked on it yesterday! I got the above block done and 2 others almost done! Click on Hot Chocolate if you want to see my last post about it and what it looks like.

Wednesday, January 10, 2007

Thank you Annie (and Annie's Friend)!

Yeah!!!! I found who's blog had the star saying on it! Thank you so much Annie and Annie's friend who gave her the sign with the saying on it after her surgery! I so appreciated the inspiration for the border! It was such a perfect saying for this quilt and the timing was exactly at the right time! (Annie's post about sign with saying.)

Tuesday, January 09, 2007

The Secret Project is Revealed

I finally get to share my secret project with you! I've been waiting now for over 3 months to share this! But I was making it for my best quilting friend here at home, but she reads my blog - so I didn't dare post it!

She has had a really hard year. Both her mom and dad were dying of cancer and she started traveling to Florida to visit and help take care of them. I guess her trips started around April, but she flew back and forth. But by summer she was down there during the weeks with sporadic trips back home on weekends. By September she was down there full time. It has been a really hard year for her. Her dad passed in September and her mom just passed New Year's Eve.

Anyway, I wanted to so much to do something for her, but there wasn't much I could do, so I started a comfort quilt for her in Sept. I collected blocks from her internet and local friends. They applique'd a heart or star on the block and then signed it. I put them together in a quilt and then added Tonya's letters for a message around the border! Doesn't it look great. But let me tell you - that was enough free form piecing for me for awhile!!!! :) I guess you can teach an old dog new tricks, but that doesn't mean he doesn't get tired!

One of you posted this saying on your blog around Sept/Oct and I"m so sorry I don't remember who it was. I think you said you painted it on a sign? Anyway, it was so perfect for the saying on the quilt I had to use it. The original saying went
"Good friends are like stars, you don't always see them but you know
that they are always there".
So I placed the words around the border
"Good friends are like stars..... you know they are always there"
And then placed on the back the middle of the saying (minus a few words - I burned out on letters!)
"you don't always see them but"

She got her quilt in the mail yesterday and just LOVED it! She was so surprised and I think shocked! She is seeing friends this weekend and can't wait to show them. I was so happy to hear happiness in her voice after such a long hard year on her! It was so good to hear a touch of excitement and pleasure.

One the home front I totally finished off the folk art pineapple quilt and remembered that I had never shown you the back! I used all the left over triangles to piece a strip on the back! Isn't it fun!

Saturday, January 06, 2007

Strippy Coin Quilt continues

Here is the center of my strippy coin quilt! I had fabric all picked out for the border, but now I"m second guessing myself! I'm going to have to lay a few out I think and see. And below is the mini quilt I made from all the trimming scraps from the columns in the big one! This one is 6" x 6"!

Friday, January 05, 2007

Featherweight Fun & Strippy Coins

I've only been wanting to make a pouch and cover for my featherweight table arm now for ages. Well since September when I saw Judy at Quilting with Ragdolls (see Sept 17th & 18th) make them. She got her featherweight about the same time I did so of course it stuck in my brain! So last night I got mine made! Wooo Hoo!!!!


And then I finally started my string coin quilt I've been wanting to make. A friend of mine has made a bunch of them and she sent me her leftover strips! So last night I got a good start! I think I"m going to make 5 rows and then I have this awesome fabric for the border - I won't tell, I have to leave something for you to look forward too! Below are Kathie's wonderful inspirations for this quilt!


Thursday, January 04, 2007

Silly Sewing

Last night I did just a bit of silly sewing. I wanted to make a pouch for my extension cord for my featherweight, so it wouldn't scratch up the featherweight anymore than it is. Not really needed, but just thought it would be fun. I had scraps of pre-quilted fabric from some tote bag samples I made for the shop, so I used that. Above is what it looks like closed.

And here it is with it unbuttoned. No pattern and I did not spend a lot of time making seams straight or any special "look". Just silly sewing!

But I did have a fun pulling my middle daughters leg with it! She is the "blonde one" and sometimes you can really get her going. So when I was turning it inside out, my hand and arm were all the way in it, with it going up past my elbow (the picture is actually even funnier because I later tried to take this myself with only one hand pulled far away from my left arm!). So she asks "What is that?" and of course she gives me "that look". I said - it is an over mitt. She says "it is not", but she only looks slightly skeptical. I said "yes it is, see it goes all the way up the inside of your arm so you don't burn yourself here". She say "no its not, is it?". She is almost believing me now, but thinking I"m TOTALLY STUPID! I said "yes, it is an oven mitt, I always burn myself on that inside part of my lower arm taking things out". By this time she has that look of "what a dork you are, and how stupid you are to make that". But more "I can't believe you burn yourself taking something out of the oven"! I tried to keep a straight face but by that time I just lost it. Oh well, so much for pulling her leg!